1.下载elk
#下载地址在下面,自行下载
#此次使用版本-6.8.17
https://www.elastic.co/cn/downloads/

elasticsearch-6.8.17.tar.gz
kibana-6.8.17-linux-x86_64.tar.gz
logstash-6.8.17.rpm

#jdk安装包
jdk-8u181-linux-x64.rpm
2.环境准备
| 版本 |
IP地址 |
部署服务 |
| Centos7.4 |
192.168.2.10 |
es主节点、kibana |
| Centos7.4 |
192.168.2.20 |
es从节点 |
3.部署java环境
#自行下载安装java包并部署,1.8版本的就可以
[root@localhost ~]# rpm -ivh jdk-8u181-linux-x64.rpm

#优化参数
[root@localhost ~]# vim /etc/sysctl.conf
vm.max_map_count = 655360
fs.file-max = 655360
[root@localhost ~]# sysctl -p
[root@localhost ~]# vim /etc/security/limits.conf
* soft nofile 65536
* hard nofile 131072
* soft nproc 2048
* hard nproc 4096

#关闭swap分区
[root@localhost ~]# swapoff -a
4.主节点部署es
#解压到/usr/local目录下
[root@localhost ~]# tar xf elasticsearch-6.8.17.tar.gz -C /usr/local/

#elasticsearch.yml文件配置(master主节点),文件在安装目录config下
[root@localhost /usr/local/elasticsearch-6.8.17]# grep "^[a-z]" config/elasticsearch.yml
cluster.name: elk
node.name: master
path.data: /usr/local/elasticsearch-6.8.17/data
path.logs: /usr/local/elasticsearch-6.8.17/logs
network.host: 192.168.2.10
http.port: 9200
discovery.zen.ping.unicast.hosts: ["192.168.2.10", "192.169.2.20"]
http.cors.enabled: true
http.cors.allow-origin: "*"
http.cors.allow-headers: Authorization,content-type
xpack.security.enabled: true
xpack.security.transport.ssl.enabled: true
xpack.security.transport.ssl.verification_mode: certificate
xpack.security.transport.ssl.keystore.path: elastic-certificates.p12
xpack.security.transport.ssl.truststore.path: elastic-certificates.p12

#签发证书
[root@localhost /usr/local/elasticsearch-6.8.17]# pwd
/usr/local/elasticsearch-6.8.17
#生成CA证书,遇到账号密码回车即可
[root@localhost /usr/local/elasticsearch-6.8.17]# bin/elasticsearch-certutil ca
#生成节点证书,遇到账号密码回车即可
[root@localhost /usr/local/elasticsearch-6.8.17]# bin/elasticsearch-certutil cert --ca elastic-stack-ca.p12
#生成完之后,会在当前目录生成两个文件,elastic-certificates.p12,elastic-stack-ca.p12,复制到config目录下和从节点的config目录下
#很关键,复制到从节点的config目录下

#设置密码,输入一个y,后面全部重复输入一个密码即可
[root@localhost /usr/local/elasticsearch-6.8.17]#bin/elasticsearch-setup-passwords interactive

#默认情况下,Elasticsearch JVM默认使用最小和最大大小为1 GB的堆。迁移到生产环境时,配置堆大小以确保Elasticsearch堆足够的大很重要的。
#jvm.options目录在于安装目录 config/jvm.options,设置内存的一半即可
-Xms4g
-Xmx4g
5.从节点部署es
#解压到/usr/local目录下
[root@localhost ~]# tar xf elasticsearch-6.8.17.tar.gz -C /usr/local/

#elasticsearch.yml文件配置(node从节点),文件在安装目录config下
[root@localhost /usr/local/elasticsearch-6.8.17]# grep "^[a-z]" config/elasticsearch.yml
cluster.name: elk
node.name: node
node.master: false
path.data: /usr/local/elasticsearch-6.8.17/data
path.logs: /usr/local/elasticsearch-6.8.17/logs
network.host: 192.168.2.20
http.port: 9200
discovery.zen.ping.unicast.hosts: ["192.168.2.10", "192.168.2.20"]
http.cors.enabled: true
http.cors.allow-origin: "*"
http.cors.allow-headers: Authorization,content-type
xpack.security.enabled: true
xpack.security.transport.ssl.enabled: true
xpack.security.transport.ssl.verification_mode: certificate
xpack.security.transport.ssl.keystore.path: elastic-certificates.p12
xpack.security.transport.ssl.truststore.path: elastic-certificates.p12

#默认情况下,Elasticsearch JVM默认使用最小和最大大小为1 GB的堆。迁移到生产环境时,配置堆大小以确保Elasticsearch堆足够的大很重要的。
#jvm.options目录在于安装目录 config/jvm.options,设置内存的一半即可
-Xms4g
-Xmx4g
6.创建es用户
#创建es用户并授权(主节点和从节点分别执行)
[root@localhost /usr/local/elasticsearch-6.8.17]# useradd es
[root@localhost /usr/local/elasticsearch-6.8.17]# chown -R es:es /usr/local/elasticsearch-6.8.17
7.俩节点启动es
[root@localhost /usr/local/elasticsearch-6.8.17/bin]# su es
[es@localhost /usr/local/elasticsearch-6.8.17/bin]$ pwd
/usr/local/elasticsearch-6.8.17/bin
[es@localhost /usr/local/elasticsearch-6.8.17/bin]$ ./elasticsearch -d
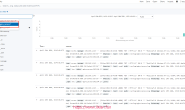
8.部署kibana
#解压文件到 /usr/local/下
[root@localhost ~]# tar xf kibana-6.8.17-linux-x86_64.tar.gz -C /usr/local/

#kibana.yml配置文件,文件在config目录下(密码为之前设置的密码)
[root@localhost /usr/local/kibana-6.8.17-linux-x86_64]# grep "^[a-z]" config/kibana.yml
server.port: 5601
server.host: "0.0.0.0"
elasticsearch.hosts: ["http://192.168.2.10:9200"]
elasticsearch.username: "kibana"
elasticsearch.password: "XXXX"

#启动kibana
[root@localhost /usr/local/kibana-6.8.17-linux-x86_64]# cd bin/
[root@localhost /usr/local/kibana-6.8.17-linux-x86_64/bin]# nohup ./kibana &
9.部署logstash
#这里logstash我直接用rpm安装的
[root@localhost ~]# rpm -ivh logstash-6.8.17.rpm

#编写收集日志脚本,写在/etc/logstash/conf.d目录下即可以.conf结尾
[root@localhost conf.d]# cat test.conf
input {
file {
path => "/etc/nginx/logs/*.log"
type => "access"
}
file {
path => "/etc/nginx/logs/error.log"
type => "error"
}
}

output {
if [type] == "access" {
elasticsearch {
hosts => ["192.168.2.10:9200"]
index => "access_%{+YYYY-MM-dd}"
user => "elastic"
password => "XXX"
}
}
if [type] == "error" {
elasticsearch {
hosts => ["192.168.2.10:9200"]
index => "error_%{+YYYY-MM-dd}"
user => "elastic"
password => "XXX"
}
}
}

#启动logstash
[root@localhost conf.d]# systemctl restart logstash.service