LNMP工作流程
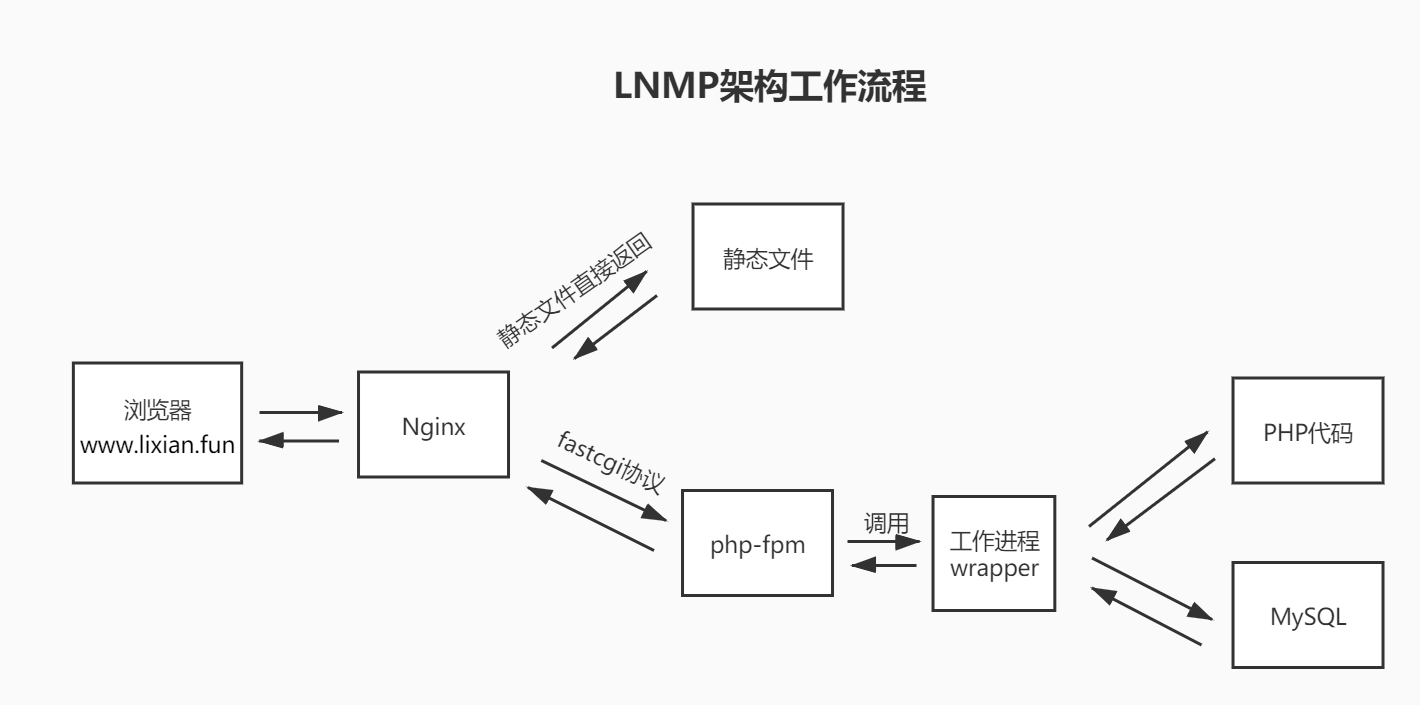
1.浏览器拿着域名去DNS服务器,DNS服务器解析域名返回IP
2.浏览器拿着IP与nginx服务器建立TCP连接
3.建立连接以后,发起请求(GET、post)
4.nginx判断请求是动态还是静态
5.如果是静态请求,nginx直接返回
6.如果是动态请求,nginx会通过fastcgi协议将请求发给php-fpm管理进程
7.php-fpm管理进程将请求下发给wrapper工作进程
8.wrapper进程判断php内容是否可以直接解析结果
9.如果可以直接解析,则返回内容
10.如果需要连接数据库等获取数据,则wrapper会去数据库获取数据,再返回数据
搭建LNMP架构环境
安装nginx服务
1.配置nginx官方源
编写nginx的官方源,使用官方源安装nginx服务。
[root@web01 ~]# vim /etc/yum.repos.d/nginx.repo
[nginx]
name=nginx repo
baseurl=http://nginx.org/packages/centos/7/$basearch/
gpgcheck=0
enabled=1
[root@web01 ~]# yum install -y nginx
2.创建www系统用户
[root@web01 ~]# groupadd www -g 666
[root@web01 ~]# useradd www -u 666 -g 666
3.配置nginx
[root@web01 ~]# vim /etc/nginx/nginx.conf
user www;
4.启动nginx并加入开机自启
[root@web01 ~]# systemctl start nginx
[root@web01 ~]# systemctl enable nginx
Created symlink from /etc/systemd/system/multi-user.target.wants/nginx.service to /usr/lib/systemd/system/nginx.service.
安装mariadb数据库服务
1.安装mariadb
[root@web01 ~]# yum install -y mariadb-server
2.启动并加入开机自启
[root@web01 ~]# systemctl start mariadb
[root@web01 ~]# systemctl enable mariadb
Created symlink from /etc/systemd/system/multi-user.target.wants/mariadb.service to /usr/lib/systemd/system/mariadb.service.
3.创建数据库密码
[root@web01 ~]# mysqladmin -uroot password '123456'
4.创建wordpress数据库
[root@web01 ~]# mysql -uroot -p123456
MariaDB [(none)]> create database wordpress;
Query OK, 1 row affected (0.00 sec)
安装php服务
1.下载php7版本压缩包并安装php服务
[root@web01 tmp]# wget https://www.lixian.fun/data/php.tar.gz
[root@web01 tmp]# tar xf php.tar.gz
[root@web01 tmp]# yum localinstall *.rpm
2.配置php用户
[root@web01 tmp]# vim /etc/php-fpm.d/www.conf
user = www
group = www
3.启动并加入开机自启
[root@web01 tmp]# systemctl start php-fpm
[root@web01 tmp]# systemctl enable php-fpm
Created symlink from /etc/systemd/system/multi-user.target.wants/php-fpm.service to /usr/lib/systemd/system/php-fpm.service.
一、搭建WordPress博客网站
1.下载WordPress源码包
[root@web01 ~]# cd /code/
[root@web01 code]# wget https://www.lixian.fun/data/wordpress-5.3.2-zh_CN.zip
2.解压代码包并授权
[root@web01 code]# unzip wordpress-5.3.2-zh_CN.zip
[root@web01 code]# chown -R www.www /code/
3.配置nginx
[root@web01 code]# cd /etc/nginx/conf.d
[root@web01 conf.d]# cat wordpress.conf
server {
    listen 80;
    server_name www.blog.com;

    location / {
        root /code/wordpress;
        index index.php;
    }

    location ~* \.php$ {
        root /code/wordpress;
        fastcgi_pass 127.0.0.1:9000;
        fastcgi_param SCRIPT_FILENAME $document_root$fastcgi_script_name;
        include fastcgi_params;
    }
}
5.重启nginx服务
[root@web01 conf.d]# systemctl restart nginx
6.本地电脑hosts解析,前面是主机ip地址,后面是域名
C:\Windows\System32\drivers\etc
10.0.0.7 www.blog.com
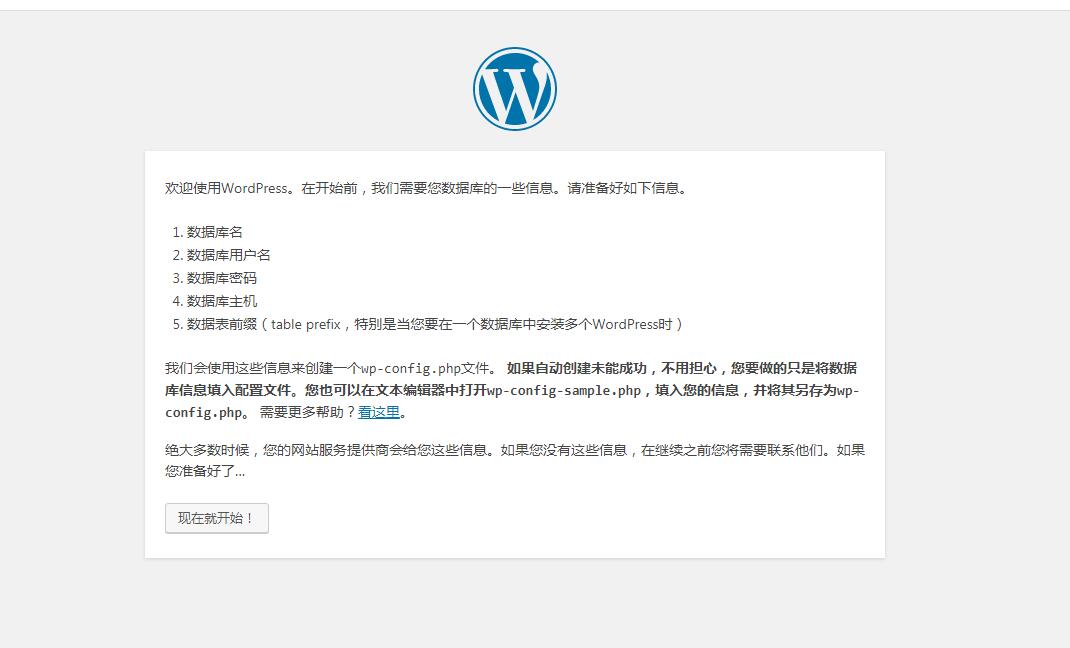
7.浏览器访问域名www.blog.com
如果失败请检查nginx配置文件,本地解析,nginx网站站点等
二、搭建知乎系统
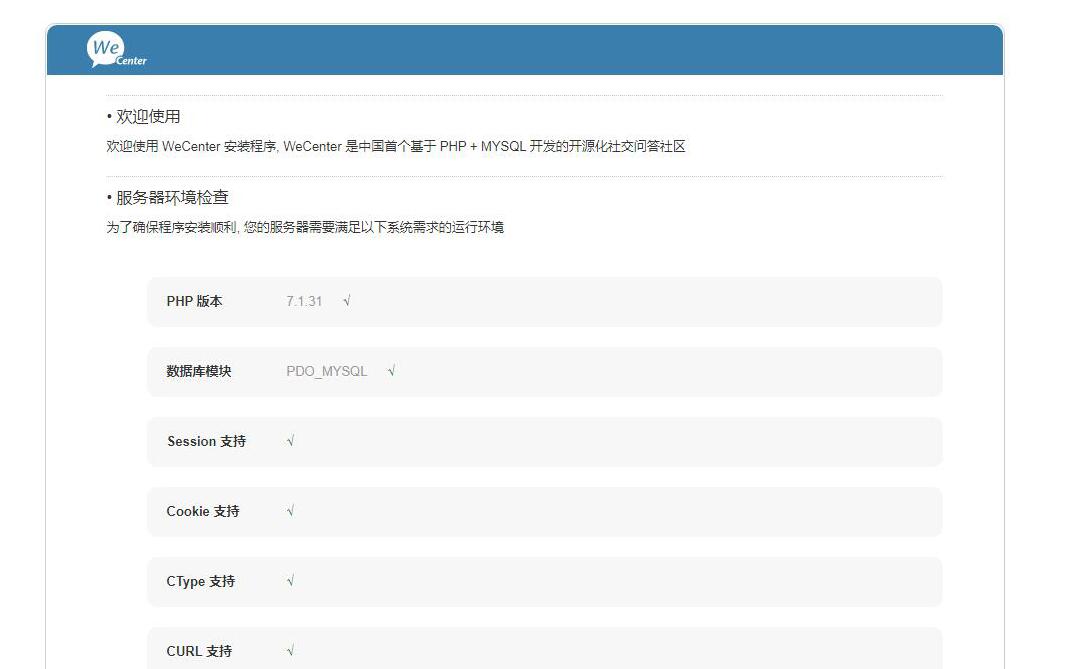
1.下载代码包
[root@web01 code]# wget https://www.lixian.fun/data/WeCenter_3-2-1.zip
[root@web01 code]# unzip WeCenter_3-2-1.zip
[root@web01 code]# mv WeCenter_3-2-1 wecenter
[root@web01 code]# chown -R www.www ./*
2.配置nginx
[root@web01 conf.d]# vim zh.conf
server {
    listen 80;
    server_name www.zh.com;

    location / {
        root /code/wecenter;
        index index.php;
    }

    location ~* \.php$ {
        root /code/wecenter;
        fastcgi_pass 127.0.0.1:9000;
        fastcgi_param SCRIPT_FILENAME $document_root$fastcgi_script_name;
        include fastcgi_params;
    }
}
3.重启nginx服务
[root@web01 conf.d]# systemctl restart nginx
4.创建数据库
[root@web01 conf.d]# mysql -uroot -p123456
MariaDB [(none)]> create database zh;
5.本地解析
C:\Windows\System32\drivers\etc
10.0.0.7 www.blog.com www.zh.com
三、搭建edusoho网课系统
1.百度下载个源码包,这里我就不给源码了,想要找我也行
[root@web01 code]# rz edusoho-8.3.36.tar.gz
2.解压代码包
[root@web01 code]# tar xf edusoho-8.3.36.tar.gz
[root@web01 code]# chown -R www.www edusoho
3.配置nginx
[root@web03 ~]# cat /etc/nginx/conf.d/edu.conf
server {
        listen 80;
        server_name www.edu.com;
        root /code/edusoho/web;
        client_max_body_size 200m;

        location / {
                index app.php;
                try_files $uri @rewriteapp;
        }
        location @rewriteapp {
                rewrite ^(.*)$ /app.php/$1 last;
        }

        location ~ ^/udisk {
                internal;
                root /code/edusoho/app/data/;
        }

        location ~ ^/(app|app_dev)\.php(/|$) {
                fastcgi_pass   127.0.0.1:9000;
                fastcgi_split_path_info ^(.+\.php)(/.*)$;
                include fastcgi_params;
                fastcgi_param  SCRIPT_FILENAME    $document_root$fastcgi_script_name;
                fastcgi_param  HTTPS              off;
                fastcgi_param HTTP_X-Sendfile-Type X-Accel-Redirect;
                fastcgi_param HTTP_X-Accel-Mapping /udisk=/code/edusoho/app/data/udisk;
                fastcgi_buffer_size 128k;
                fastcgi_buffers 8 128k;
        }

        # 配置设置图片格式文件
        location ~* \.(jpg|jpeg|gif|png|ico|swf)$ {
                # 过期时间为3年
                expires 3y;
                # 关闭日志记录
                access_log off;
                # 关闭gzip压缩,减少CPU消耗,因为图片的压缩率不高。
                gzip off;
        }
        # 配置css/js文件
        location ~* \.(css|js)$ {
                access_log off;
                expires 3y;
        }
        # 禁止用户上传目录下所有.php文件的访问,提高安全性
        location ~ ^/files/.*\.(php|php5)$ {
                deny all;
        }

        # 以下配置允许运行.php的程序,方便于其他第三方系统的集成。
        location ~ \.php$ {
                fastcgi_pass   127.0.0.1:9000;
                fastcgi_split_path_info ^(.+\.php)(/.*)$;
                include fastcgi_params;
                fastcgi_param  SCRIPT_FILENAME    $document_root$fastcgi_script_name;
                fastcgi_param  HTTPS              off;
        }
}
4.重启nginx服务
[root@web01 code]# systemctl restart nginx
5.优化参数
[root@web01 code]# vim /etc/php.ini
post_max_size = 200M
upload_max_filesize = 200M
6.本地解析
C:\Windows\System32\drivers\etc
10.0.0.7 www.blog.com www.zh.com www.edu.com
